Showing posts with label keycloak. Show all posts

June 12, 2025

Understanding authSession.setAction(AUTHENTICATE) and Related Settings in Keycloak Login Flows

When customizing login flows in Keycloak—especially during first login with an identity provider (IdP)—you often interact with the AuthenticationSessionModel and AuthenticatedClientSessionModel. If you’ve looked at lines like the following and wondered what they do or why they’re necessary, this blog is for you:

authSession.setProtocol(OIDCLoginProtocol.LOGIN_PROTOCOL);
authSession.setClientNote(OIDCLoginProtocol.ISSUER, Urls.realmIssuer(session.getContext().getUri().getBaseUri(), realm.getName()));
authSession.setClientNote(OIDCLoginProtocol.SCOPE_PARAM, "openid");
authSession.setAction(AuthenticatedClientSessionModel.Action.AUTHENTICATE.name());

๐ŸŽฏ Problem Statement

In a custom login flow, particularly when modifying the first broker login flow, missing or incorrect session attributes can result in:

  • invalid_request or invalid_signature errors

  • missing id_tokens

  • broken post-login steps like account linking or consent pages

  • failure to issue access or refresh tokens

To ensure smooth interoperability between Keycloak and the OIDC protocol, it's essential to explicitly configure the authSession.


๐Ÿงช What Each Line Does and Why It Matters

1️⃣ authSession.setProtocol(OIDCLoginProtocol.LOGIN_PROTOCOL);

  • Purpose: Tells Keycloak that the current session is using the openid-connect protocol.

  • Why it's important: Without it, Keycloak might not route the request properly or issue OIDC-compliant tokens.


2️⃣ authSession.setClientNote(OIDCLoginProtocol.ISSUER, <issuer-url>);

  • Purpose: Sets the issuer for the session, which is later embedded in the id_token.

  • Why it's important: If this doesn’t match the value expected by the client, token verification will fail with an "invalid issuer" error.


3️⃣ authSession.setClientNote(OIDCLoginProtocol.SCOPE_PARAM, "openid");

  • Purpose: Specifies the OAuth2/OIDC scopes requested by the client.

  • Why it's important: The "openid" scope is required to receive an id_token. If omitted, your application won’t get identity claims.


4️⃣ authSession.setAction(AUTHENTICATE);

  • Purpose: Sets the session's current action to AUTHENTICATE, signaling Keycloak that the user is in the authentication step.

  • Why it's important:

    • Drives what Keycloak will do next (e.g., show login form, redirect to consent).

    • Affects what happens after authentication—like whether required actions or token exchange steps will run.

    • Without it, the flow can end prematurely or fail entirely.


๐Ÿงพ Available Actions in AuthenticatedClientSessionModel.Action

These enum values define what stage the user is currently in within the Keycloak login or token flow:

Action Description
AUTHENTICATE User is currently authenticating (e.g., login form, social login)
LOGGED_IN Authentication is completed successfully
REQUIRED_ACTIONS User must perform additional steps (verify email, update password, etc.)
CODE_TO_TOKEN The client is exchanging an authorization code for tokens (OAuth2 Code Flow)
OAUTH_GRANT The user is granting consent to the client for requested scopes
REGISTER User is undergoing the registration flow

These values control what happens next in the flow, which UI screens are shown, and which server-side logic gets triggered.


๐Ÿงฉ Where You Typically Use This

These session settings are commonly found in:

  • IdpCreateUserIfUniqueAuthenticator (default first-login logic)

  • Your custom Authenticator or AuthenticatorFactory when extending login flow

  • SPIs that handle custom logic during IdP login or user account creation


✅ Best Practices

  • Always set the protocol, scope, and issuer for custom login flows.

  • Set the action to match the current step (AUTHENTICATE, REGISTER, etc.).

  • Ensure you do this before token issuance or response handling steps.


๐Ÿšซ What Happens If You Skip These

Setting Without It...
setProtocol(...) Flow might not work; tokens might not be generated.
setClientNote(ISSUER) id_token may have wrong issuer → validation fails.
setClientNote(SCOPE_PARAM) No id_token, breaking OIDC login.
setAction(AUTHENTICATE) Flow breaks midway or doesn't trigger post-login handlers.

๐Ÿง  Conclusion

Customizing Keycloak login flows is powerful but requires careful handling of session metadata. These authSession configurations are not optional—they are critical building blocks for a stable and secure authentication experience.

If you're implementing a custom Authenticator or enhancing the first-broker-login flow, make sure to explicitly set these session details to avoid unpredictable errors and ensure a smooth experience for both users and client applications.

April 4, 2025

Understanding the Token Lifecycle in OAuth2 & OpenID Connect

In modern authentication systems, especially with Keycloak, OAuth2, and OpenID Connect, understanding the lifecycle of tokens is crucial for building secure and scalable applications.

This blog explores the Token Lifecycle—what it looks like, why it's essential, and how each phase works in practice. Whether you're a backend developer integrating Keycloak or a DevOps engineer managing secure access, this will give you clarity on how tokens behave.


✨ Why the Token Lifecycle Matters

Tokens are the keys to accessing protected resources. Mismanaging them can lead to security vulnerabilities like:

  • Unauthorized access

  • Token reuse attacks

  • Inconsistent session management

Understanding how tokens are issued, validated, refreshed, and revoked can help mitigate these issues and improve user experience.


๐ŸŒ The Token Lifecycle: Step-by-Step

+---------------------------+
|  User / Service Logs In   |
+---------------------------+
             |
             v
+---------------------------+
|  Token Endpoint Issues:   |
|  - Access Token           |
|  - ID Token (optional)    |
|  - Refresh Token          |
+---------------------------+
             |
             v
+---------------------------+
|   Access Token Used to    |
|   Call Protected APIs     |
+---------------------------+
             |
             v
+---------------------------+
|   Token Expires OR        |
|   API Returns 401         |
+---------------------------+
             |
             v
+---------------------------+
| Refresh Token Sent to     |
|    /token Endpoint         |
+---------------------------+
             |
             v
+---------------------------+
| New Tokens Issued         |
| (Access + ID)             |
+---------------------------+
             |
             v
+---------------------------+
| Optional: Logout or       |
| Session Revocation        |
+---------------------------+
             |
             v
+---------------------------+
| Tokens Invalidated        |
+---------------------------+

๐Ÿ“‰ Token Types Overview

Token Type Purpose Validity
Access Token Used for accessing protected resources (APIs) Short-lived
Refresh Token Used to get new access tokens without re-authentication Long-lived
ID Token Provides identity information (for OpenID Connect) Short-lived

⚖️ Introspection and Revocation

  • Introspection: Allows you to verify if a token is still active.

    curl -X POST \
      https://<keycloak>/protocol/openid-connect/token/introspect \
      -d "token=<access_token>" \
      -d "client_id=<client_id>" \
      -d "client_secret=<client_secret>"
    
  • Revocation: Lets the client invalidate refresh tokens explicitly.

    curl -X POST \
      https://<keycloak>/protocol/openid-connect/revoke \
      -d "token=<refresh_token>" \
      -d "client_id=<client_id>" \
      -d "client_secret=<client_secret>"
    

๐Ÿ” Best Practices

  • Always use HTTPS for all token operations.

  • Set appropriate token lifespans based on security needs.

  • Regularly introspect tokens if needed for backend validation.

  • Avoid long-lived access tokens; prefer rotating refresh tokens.


๐Ÿ”น Conclusion

The token lifecycle is more than just issuing a token—it's a continuous process of managing user sessions securely and efficiently. By understanding this lifecycle, you can build systems that are both user-friendly and secure.

Next time you're dealing with token-based authentication, remember: knowing the lifecycle is half the battle.


Happy coding! ๐Ÿš€

๐Ÿ” Complete Guide to Keycloak Tokens: Access, ID, Refresh & Service Accounts

A hands-on walkthrough for developers and architects on working with Keycloak token mechanisms and OpenID Connect endpoints.


๐ŸŒŸ Why Tokens and Introspection Matter – A Developer's Story

Imagine you're building a secure API that handles sensitive data like user profiles, financial transactions, or confidential communications. You want to ensure that only authorized users and systems can access the data—and that they're who they claim to be. Enter tokens and introspection.

Tokens are your security pass. They carry claims about the identity and access rights of whoever is calling your service. But just like real-world passes, they can be stolen, expire, or be misused. This is where introspection becomes your secret security checkpoint—allowing you to double-check if the pass is still valid and what permissions it carries.

Without introspection or validation:

  • You might trust an expired or revoked token.

  • Unauthorized access may go unnoticed.

  • You're blind to token misuse or anomalies.

Choosing whether to introspect or decode JWT locally is an architectural decision:

  • Use local JWT parsing when performance is key and you're okay trusting signed tokens.

  • Use introspection when tokens might be revoked early or when access policies are dynamic.


๐Ÿ“˜ What Are Tokens in Keycloak?

Token Type Purpose Lifespan
Access Token Authorize access to APIs/resources Short-lived (e.g., 5 mins)
ID Token Carries identity information about the user Same as access token
Refresh Token Get new access token without re-login Long-lived (e.g., 30 mins or more)

๐Ÿข Service Account Clients (Machine-to-Machine)

Use service accounts when no end user is involved. This is ideal for backend-to-backend communication.

๐Ÿ”ง How to Enable Service Accounts

  1. Go to your Keycloak admin console.

  2. Navigate to Clients > Select your client.

  3. Set Access Type to confidential.

  4. Enable Service Accounts Enabled.

  5. Assign roles via the Service Account Roles tab.

✨ Generate Token Using Client Credentials Flow

curl -X POST 'http://localhost:8080/realms/<realm>/protocol/openid-connect/token' \
-H "Content-Type: application/x-www-form-urlencoded" \
-d "grant_type=client_credentials" \
-d "client_id=<client-id>" \
-d "client_secret=<client-secret>"

๐Ÿ‘ค Access, ID, and Refresh Tokens (User Login Flow)

๐Ÿ“„ Get Tokens Using Resource Owner Password Credentials (ROPC) Flow

curl -X POST 'http://localhost:8080/realms/<realm>/protocol/openid-connect/token' \
-H "Content-Type: application/x-www-form-urlencoded" \
-d "grant_type=password" \
-d "client_id=<client-id>" \
-d "client_secret=<client-secret>" \
-d "username=<username>" \
-d "password=<password>"

✅ Example Response:

{
  "access_token": "...",
  "refresh_token": "...",
  "id_token": "...",
  "expires_in": 300,
  "refresh_expires_in": 1800
}

๐Ÿ”„ Refreshing Tokens

Use the refresh token to obtain a new access + ID token without requiring user credentials again.

curl -X POST 'http://localhost:8080/realms/<realm>/protocol/openid-connect/token' \
-H "Content-Type: application/x-www-form-urlencoded" \
-d "grant_type=refresh_token" \
-d "client_id=<client-id>" \
-d "client_secret=<client-secret>" \
-d "refresh_token=<refresh-token>"

๐Ÿšซ Revoking Tokens and Logout

๐Ÿ” End User Logout

curl -X POST 'http://localhost:8080/realms/<realm>/protocol/openid-connect/logout' \
-H "Content-Type: application/x-www-form-urlencoded" \
-d "client_id=<client-id>" \
-d "client_secret=<client-secret>" \
-d "refresh_token=<refresh-token>"

๐Ÿ› ️ Manual Revocation via Admin Console

  • Go to Realm > Sessions.

  • Revoke all or specific user sessions.


๐Ÿ•ต️ Introspecting Tokens

Token introspection helps validate and decode access tokens without relying solely on JWT parsing.

This is crucial when:

  • You're using opaque tokens instead of JWTs.

  • You want to support early revocation of access.

  • You're building a resource server and want dynamic policy enforcement.

๐Ÿ“ฅ How to Introspect a Token (For Bearer Token Validation)

curl -X POST 'http://localhost:8080/realms/<realm>/protocol/openid-connect/token/introspect' \
-u <client-id>:<client-secret> \
-H "Content-Type: application/x-www-form-urlencoded" \
-d "token=<access-token>"

๐Ÿงพ Sample Introspection Response

{
  "active": true,
  "exp": 1687891234,
  "iat": 1687887634,
  "client_id": "your-client-id",
  "username": "user@example.com",
  "scope": "profile email",
  "sub": "user-uuid",
  "realm_access": { "roles": ["user"] }
}

You can use Spring Security's OpaqueTokenIntrospector for this, or call the endpoint manually using WebClient.


๐Ÿง  Best Practices & Configuration Rules

  • Access Tokens: JWT, sent in the Authorization: Bearer header.

  • ID Tokens: Meant for clients (not APIs). Carry user identity info.

  • Refresh Tokens: Must be stored securely (prefer backend or HTTP-only cookies).

  • Token Lifespans: Configure in Realm Settings > Tokens tab.

  • Public Clients: Use PKCE, do not use client secrets.

  • Confidential Clients: Always use client secret.

  • Avoid hardcoding secrets in client-side apps.

  • Decide on introspection vs. local parsing based on your app's architecture and trust model.


๐Ÿ”ข Testing Flow Summary

Step Token Type Endpoint
Login with credentials access_token, id_token, refresh_token /token
Use access token Authorization header for secured APIs Your protected API
Refresh token New access_token, id_token /token with refresh_token
Logout / Revoke Ends session & invalidates tokens /logout
Introspect token Validate and decode token details /token/introspect

๐Ÿ“š Additional Resources


๐Ÿš€ Want More?

Let me know if you'd like:

  • Java + Spring Security + Keycloak examples

  • Postman collections

  • React + PKCE front-end tutorial

Follow for more backend & security insights!


Author: Jatin
Tags: #Keycloak #OAuth2 #OpenIDConnect #JWT #BackendSecurity #SpringBoot

March 19, 2025

Locked vs. Disabled Users: Understanding the Difference and Implementing Secure Account Lockout Mechanism

Introduction

In modern authentication systems, protecting user accounts from unauthorized access is crucial. Two common mechanisms to prevent unauthorized access are locked users and disabled users. Understanding the difference between them and implementing a robust strategy to block users after multiple failed login attempts while allowing them to regain access securely is essential for maintaining both security and user experience.

Locked Users vs. Disabled Users

Locked Users

A locked user is temporarily restricted from accessing their account due to security policies, such as multiple failed login attempts. The lockout period usually lasts for a predefined time or until the user takes a recovery action.

  • Temporary restriction
  • Can be unlocked after a certain time or by resetting the password
  • Used to protect against brute-force attacks
  • Account remains valid

Disabled Users

A disabled user is permanently restricted from accessing their account unless manually re-enabled by an administrator or through a specific process.

  • Permanent restriction until manually reactivated
  • Used for security concerns, policy violations, or account closures
  • User cannot regain access without admin intervention
  • Account may be considered inactive or banned

Enabled Users

An enabled user is an account that is active and can log in without restrictions unless specific security policies trigger a lockout or disablement.

  • Active account status
  • User can access all authorized resources
  • Can be affected by security policies, such as lockout rules

Goal: Implementing Secure Account Lockout in Keycloak

To enhance security, we aim to implement a temporary user lockout mechanism after a certain number of failed login attempts, ensuring unauthorized access is prevented while allowing legitimate users to regain access securely.

Configuring Keycloak Lockout Policies

In Keycloak, you can configure account lockout settings under the Authentication section.

Keycloak Lockout Parameters

  • Max Login Failures: Number of failed login attempts before the user is locked (e.g., 2).
  • Permanent Lockout: If enabled, the user is locked permanently until manually unlocked.
  • Wait Increment: The time delay before allowing another login attempt (set to 0 for no delay).
  • Max Wait: Maximum wait time before the user can retry login (e.g., 15 minutes).
  • Failure Reset Time: Duration after which failed attempts are reset (e.g., 15 hours).
  • Quick Login Check Milliseconds: The minimum time to check for quick successive login failures (e.g., 977ms).
  • Minimum Quick Login Wait: Minimum wait time before the system processes the next login attempt (e.g., 15 seconds).

Internal Working of Keycloak Lockout Mechanism

Keycloak tracks login failures using its Event Listener SPI, which records authentication events. The UserModel stores failed attempts, and the system enforces lockout based on these values.

Keycloak Classes Involved in Lockout

  1. org.keycloak.authentication.authenticators.browser.AbstractUsernameFormAuthenticator - Handles login authentication and failed attempts tracking.
  2. org.keycloak.models.UserModel - Stores user attributes, including failed login attempts.
  3. org.keycloak.services.managers.AuthenticationManager - Enforces lockout policies and authentication flows.
  4. org.keycloak.authentication.authenticators.directgrant.ValidatePassword - Validates passwords and increments failure count.
  5. org.keycloak.events.EventBuilder - Logs authentication failures and successes.

Extending Keycloak Lockout Mechanism

To customize the lockout logic, you can extend AbstractUsernameFormAuthenticator and override the authentication logic.

Custom Lockout Provider Example:

public class CustomLockoutAuthenticator extends AbstractUsernameFormAuthenticator {
    private static final String FAILED_ATTEMPTS = "failedLoginAttempts";
    private static final String LOCKOUT_EXPIRY = "lockoutExpiryTime";

    @Override
    public void authenticate(AuthenticationFlowContext context) {
        UserModel user = context.getUser();
        int attempts = user.getAttributeStream(FAILED_ATTEMPTS)
                .findFirst().map(Integer::parseInt).orElse(0);
        long expiry = user.getAttributeStream(LOCKOUT_EXPIRY)
                .findFirst().map(Long::parseLong).orElse(0L);

        if (System.currentTimeMillis() < expiry) {
            context.failure(AuthenticationFlowError.USER_TEMPORARILY_DISABLED);
            return;
        }

        context.success();
    }

    public void loginFailed(UserModel user) {
        int attempts = user.getAttributeStream(FAILED_ATTEMPTS)
                .findFirst().map(Integer::parseInt).orElse(0) + 1;
        user.setSingleAttribute(FAILED_ATTEMPTS, String.valueOf(attempts));

        if (attempts >= 5) {
            user.setSingleAttribute(LOCKOUT_EXPIRY, 
                String.valueOf(System.currentTimeMillis() + 15 * 60 * 1000));
        }
    }
}

Managing Lockout Time in the Database

The locked time can be stored in the database using the USER_ENTITY table's attributes.

  • Lockout Expiry Time: A timestamp indicating when the user can log in again.
  • Failed Login Attempts: Counter for tracking failed attempts.

Calculating Remaining Lockout Time

To display the remaining time to the user:

long expiryTime = Long.parseLong(user.getFirstAttribute("lockoutExpiryTime"));
long remainingTime = expiryTime - System.currentTimeMillis();
if (remainingTime > 0) {
    long minutes = TimeUnit.MILLISECONDS.toMinutes(remainingTime);
    System.out.println("Your account is locked. Try again in " + minutes + " minutes.");
}

Which Table Stores Max Wait and Other Parameters?

The REALM table in Keycloak stores:

  • maxLoginFailures
  • waitIncrementSeconds
  • maxWaitSeconds
  • failureResetTimeSeconds

These values can be retrieved in an event listener for authentication events.

Event Triggered for Wrong Login Attempts

  • EventType.LOGIN_ERROR: Triggered when a login attempt fails.

Sending Email After X Failed Attempts

To send an email after multiple failures:

if (failedAttempts >= maxLoginFailures) {
    eventBuilder.event(EventType.SEND_RESET_PASSWORD)
        .user(user)
        .realm(realm)
        .success();
    sendLockoutEmail(user);
}

Conclusion

Implementing a secure account lockout mechanism in Keycloak enhances security while maintaining a user-friendly experience. By configuring temporary locks, custom messages, and extending Keycloak providers, we can effectively protect user accounts from unauthorized access while allowing legitimate users to regain access securely.

March 16, 2025

The 4 A's of Identity: A Framework for Secure Access Management

Identity and access management (IAM) is a crucial aspect of modern security. As organizations move towards digital transformation, ensuring that the right people have the right access to the right resources at the right time is vital. The 4 A's of Identity provide a structured approach to managing identity and access securely. These four A’s are Authentication, Authorization, Administration, and Auditing.

Many organizations leverage IAM solutions like Keycloak, an open-source identity and access management (IAM) tool, to implement these principles efficiently.

1. Authentication: Verifying Identity

Authentication is the process of confirming a user's identity before granting access to a system or resource. It ensures that the entity requesting access is who they claim to be.

Common Authentication Methods:

  • Passwords – Traditional method but susceptible to breaches.
  • Multi-Factor Authentication (MFA) – Enhances security by requiring multiple verification factors (e.g., OTP, biometrics). Keycloak supports MFA to strengthen authentication.
  • Biometric Authentication – Uses fingerprints, facial recognition, or retina scans for identity verification.
  • Single Sign-On (SSO) – Allows users to log in once and gain access to multiple systems without re-authenticating. Keycloak provides built-in SSO capabilities, making it easier to manage identity across multiple applications.

2. Authorization: Defining Access Rights

Authorization determines what resources an authenticated user can access and what actions they can perform. It ensures that users only have access to the data and functionalities necessary for their role.

Authorization Models:

  • Role-Based Access Control (RBAC) – Assigns permissions based on user roles. Keycloak natively supports RBAC, allowing admins to manage user permissions easily.
  • Attribute-Based Access Control (ABAC) – Grants access based on attributes like location, time, and device type.
  • Policy-Based Access Control (PBAC) – Uses defined policies to enforce security rules dynamically.
  • Zero Trust Model – Ensures continuous verification of access requests based on various factors. Keycloak integrates with Zero Trust strategies by enforcing strong authentication and dynamic authorization policies.

3. Administration: Managing Identity and Access Lifecycle

Administration involves managing user identities, roles, and access permissions throughout their lifecycle in an organization. This includes onboarding, role changes, and offboarding.

Key Administrative Tasks:

  • User Provisioning and Deprovisioning – Ensuring users receive appropriate access when they join or leave. Keycloak provides automated provisioning and deprovisioning via integration with various identity providers.
  • Access Reviews and Recertification – Periodically checking access rights to prevent privilege creep.
  • Identity Federation – Allowing users to use one set of credentials across multiple domains. Keycloak supports identity federation, allowing integration with external identity providers such as Google, Microsoft, and LDAP.
  • Privileged Access Management (PAM) – Managing and securing access to sensitive systems and accounts.

4. Auditing: Monitoring and Compliance

Auditing ensures accountability by tracking and recording identity and access activities. It helps organizations detect anomalies, enforce policies, and comply with security regulations.

Auditing Practices:

  • Log Monitoring – Keeping records of authentication and access events. Keycloak provides detailed logs and monitoring features to track authentication and authorization events.
  • Security Information and Event Management (SIEM) – Analyzing security logs to detect threats.
  • Compliance Reporting – Meeting regulatory requirements like GDPR, HIPAA, and SOC 2. Keycloak assists with compliance by providing detailed auditing and logging features.
  • Anomaly Detection – Identifying suspicious activities such as unusual login patterns.

Conclusion

The 4 A’s of Identity—Authentication, Authorization, Administration, and Auditing—serve as the foundation for a secure identity management framework. By implementing these principles effectively, organizations can safeguard their data, protect user privacy, and comply with industry regulations. Keycloak simplifies this process by offering a robust IAM solution that supports authentication, authorization, and auditing with built-in security features. As security threats evolve, a robust identity and access management (IAM) strategy is essential for mitigating risks and ensuring seamless digital interactions.

More Topics to Read

  • Keycloak Authentication and SSO Implementation
  • Zero Trust Security Model: A Comprehensive Guide
  • Best Practices for Multi-Factor Authentication (MFA)
  • Role-Based vs Attribute-Based Access Control: Key Differences
  • Identity Federation and Single Sign-On (SSO) Explained
  • How to Implement Privileged Access Management (PAM)
  • Compliance Standards in IAM: GDPR, HIPAA, and SOC 2

March 15, 2025

The Growing Demand for Keycloak: Current and Future Features, Company Adoption, and Career Opportunities

Introduction

In today’s digital world, Identity and Access Management (IAM) plays a crucial role in securing applications and services. Among the various IAM solutions, Keycloak has emerged as a leading open-source identity provider, offering seamless authentication, authorization, and integration capabilities. Organizations across different industries are adopting Keycloak due to its flexibility, security features, and cost-effectiveness. This blog explores the current and future needs for Keycloak, its growing adoption, and why mastering Keycloak is becoming an essential skill in the IAM domain.

Why Organizations Need Keycloak Today

Organizations face several challenges related to authentication and identity management, including:

  1. Secure and Seamless Authentication: Companies need a robust Single Sign-On (SSO) solution to enhance user experience and security.
  2. Identity Federation: Organizations require identity federation to integrate with third-party authentication providers like Google, Facebook, and Microsoft Entra ID.
  3. Scalability: Enterprises need an IAM solution that can scale to millions of users with high availability.
  4. Multi-Factor Authentication (MFA): Enforcing MFA is critical for enhancing security against cyber threats.
  5. Access Control: Fine-grained authorization policies help manage permissions effectively.

Keycloak meets all these requirements while being an open-source solution, making it an attractive choice for organizations looking for cost-effective IAM solutions.

Companies Using Keycloak

Several large enterprises and tech companies are leveraging Keycloak for their authentication and identity management needs. Here’s a list of some well-known companies using Keycloak:

Company Industry IAM Usage
Red Hat Software Integrated into Red Hat SSO
Postman API Development Secure API authentication
Siemens Industrial Tech Employee and IoT authentication
Amadeus Travel Tech Secure access for users and partners
Adidas Retail Customer authentication and SSO
Vodafone Telecommunications Identity and access control
T-Systems IT Services Enterprise identity management
Hitachi Engineering Secure authentication for internal tools
Daimler Automotive Employee IAM system

Even though companies like Google, Apple, Microsoft, and Facebook have their own IAM solutions, other enterprises prefer Keycloak due to its flexibility and ability to integrate across different ecosystems.

Comparison of Keycloak Versions (v12 to v26)

Keycloak has continuously evolved to meet modern IAM challenges. Here’s a version-wise comparison of its key enhancements:

Version Key Features & Improvements
12 Improved authorization services, better clustering support, new admin console UX
13 Identity brokering enhancements, WebAuthn support, optimized database performance
14 Improved event logging, OpenID Connect (OIDC) dynamic client registration
15 Stronger password policies, enhancements to session management
16 OAuth 2.1 compatibility, new LDAP integration features
17 Initial Quarkus distribution, faster startup time, better memory efficiency
18 Full migration to Quarkus, improved operator support
19 Security patches, fine-grained user session management
20 Kubernetes-friendly deployment enhancements, better CI/CD integration
21 Identity federation improvements, performance optimizations
22 Advanced MFA support, better compliance with modern security standards
23 Streamlined UI, refined access policies
24 Faster authentication flows, updated default themes
25 AI-driven anomaly detection, expanded cloud-native support
26 Improved passwordless authentication, WebAuthn enhancements

The Future of Keycloak: Upcoming Features

Keycloak’s roadmap includes several cutting-edge features to meet future IAM demands:

  1. Decentralized Identity Support – Integration with self-sovereign identity (SSI) solutions such as blockchain-based authentication.
  2. Enhanced AI-Driven Security – AI-powered anomaly detection and risk-based authentication.
  3. More Cloud-Native Capabilities – Seamless integration with Kubernetes and microservices architectures.
  4. Improved Passwordless Authentication – Expanded support for biometric and FIDO2 authentication.
  5. Zero Trust Architecture (ZTA) – Strengthening security by continuously verifying identity and access permissions.

Career Opportunities in Keycloak & IAM

With the increasing adoption of Keycloak, the demand for IAM professionals with Keycloak expertise is growing rapidly. Here are some key job roles:

  1. IAM Engineer – Implementing and managing authentication solutions using Keycloak.
  2. Security Architect – Designing secure identity management architectures.
  3. DevSecOps Engineer – Integrating IAM solutions into DevOps pipelines.
  4. Cloud Security Specialist – Deploying and managing IAM in cloud environments.
  5. Cybersecurity Consultant – Advising organizations on best identity security practices.

Salary Trends

IAM professionals with Keycloak skills command attractive salaries:

  • Entry-Level (0-3 years): ₹6-12 LPA (India) / $70,000 - $100,000 (US)
  • Mid-Level (3-7 years): ₹12-25 LPA (India) / $100,000 - $150,000 (US)
  • Senior-Level (7+ years): ₹25-50 LPA (India) / $150,000+ (US)

Conclusion

Keycloak has become an essential IAM solution, offering security, scalability, and flexibility. Organizations across industries, from software to telecom, are adopting Keycloak to secure their authentication processes. As IAM continues to evolve, Keycloak remains a strong contender with its open-source model and continuous innovation.

With the rising demand for IAM expertise, professionals skilled in Keycloak will find numerous career opportunities in cybersecurity and cloud security. Whether you're an enterprise looking for an IAM solution or an aspiring IAM professional, now is the best time to explore Keycloak and its future potential.


Are you using Keycloak or another IAM solution? Share your experiences in the comments!

February 25, 2025

Mastering Multi-Realm Authentication in NestJS with Keycloak

Introduction

In modern applications, especially those built for multi-tenancy, managing authentication across multiple Keycloak realms is a common requirement. Each realm can represent a different tenant, organization, or security boundary.

This guide will teach you how to configure NestJS with Keycloak to support multiple realms, implement guard enforcement policies, and perform token introspection dynamically based on different client_ids and roles.

By the end of this guide, you will:

  • ✅ Understand how Keycloak realms work
  • ✅ Learn how to integrate multiple realms dynamically
  • ✅ Implement role-based access control
  • ✅ Secure routes using Keycloak Guards
  • ✅ Perform token introspection with multiple client_ids and roles

๐Ÿ”น What is a Keycloak Realm?

A realm in Keycloak is an isolated authentication domain. Each realm has its own users, roles, groups, and clients. This is useful for multi-tenancy, where different clients or organizations should have separate authentication policies.

Example Use Case:

  • CompanyA uses realm-a with client-1.
  • CompanyB uses realm-b with client-2.

In this scenario, authentication should be dynamically determined based on the request context.


Step 1: Install Dependencies

First, install the necessary packages to integrate Keycloak with NestJS.

npm install nest-keycloak-connect

Step 2: Create a Multi-Realm Configuration Service

Since nest-keycloak-connect expects a single realm configuration, we need a service that resolves realm and client dynamically.

MultiTenantKeycloakConfigService

Create a service that provides dynamic configuration based on the request.

import { Injectable, Scope, Request } from '@nestjs/common';
import {
  KeycloakOptionsFactory,
  KeycloakConnectOptions,
} from 'nest-keycloak-connect';

@Injectable({ scope: Scope.REQUEST }) // Per-request scope
export class MultiTenantKeycloakConfigService implements KeycloakOptionsFactory {
  private readonly realmConfigs = {
    tenant1: {
      realm: 'realm-1',
      clientId: 'client-1',
      secret: 'secret-1',
    },
    tenant2: {
      realm: 'realm-2',
      clientId: 'client-2',
      secret: 'secret-2',
    },
  };

  createKeycloakConnectOptions(@Request() req): KeycloakConnectOptions {
    const realmKey = this.getTenantFromRequest(req);
    const config = this.realmConfigs[realmKey];

    if (!config) {
      throw new Error(`No configuration found for tenant: ${realmKey}`);
    }

    return {
      authServerUrl: 'http://your-keycloak-server/auth',
      realm: config.realm,
      clientId: config.clientId,
      secret: config.secret,
      cookieKey: 'KEYCLOAK_JWT',
    };
  }

  private getTenantFromRequest(req): string {
    return req.headers['x-tenant-id'] || 'default';
  }
}

Step 3: Register Multi-Realm Configuration in app.module.ts

Modify AppModule to use the dynamic Keycloak configuration.

import { Module } from '@nestjs/common';
import { KeycloakConnectModule } from 'nest-keycloak-connect';
import { MultiTenantKeycloakConfigService } from './multi-tenant-keycloak-config.service';

@Module({
  imports: [
    KeycloakConnectModule.registerAsync({
      useClass: MultiTenantKeycloakConfigService,
    }),
  ],
})
export class AppModule {}

Step 4: Implement Keycloak Guards for Role-Based Access Control (RBAC)

Guards enforce authentication and authorization policies.

import { Injectable, CanActivate, ExecutionContext } from '@nestjs/common';
import { Reflector } from '@nestjs/core';
import { KeycloakGuard } from 'nest-keycloak-connect';

@Injectable()
export class RoleGuard extends KeycloakGuard implements CanActivate {
  constructor(private reflector: Reflector) {
    super();
  }

  canActivate(context: ExecutionContext): boolean {
    const requiredRoles = this.reflector.get<string[]>('roles', context.getHandler());
    if (!requiredRoles) return true;
    const request = context.switchToHttp().getRequest();
    const userRoles = request.user.roles;
    return requiredRoles.some(role => userRoles.includes(role));
  }
}

Usage in Controllers:

import { Controller, Get, UseGuards } from '@nestjs/common';
import { Roles } from 'nest-keycloak-connect';
import { RoleGuard } from './role.guard';

@Controller('secure')
export class SecureController {
  @Get()
  @Roles('admin') // Restrict access to users with 'admin' role
  @UseGuards(RoleGuard)
  getSecureData() {
    return { message: 'You have accessed a protected route' };
  }
}

Step 5: Implement Token Introspection with Different Clients & Roles

Token introspection allows validating and extracting claims from tokens issued by different clients in multiple realms.

import { Injectable, ExecutionContext, CanActivate } from '@nestjs/common';
import axios from 'axios';

@Injectable()
export class TokenIntrospectionGuard implements CanActivate {
  async canActivate(context: ExecutionContext): Promise<boolean> {
    const request = context.switchToHttp().getRequest();
    const token = request.headers.authorization?.split(' ')[1];
    if (!token) return false;

    const clientConfig = this.getClientConfig(request.headers['x-tenant-id']);
    const introspectionUrl = `${clientConfig.authServerUrl}/realms/${clientConfig.realm}/protocol/openid-connect/token/introspect`;

    const response = await axios.post(introspectionUrl, {
      token,
      client_id: clientConfig.clientId,
      client_secret: clientConfig.secret,
    });

    return response.data.active;
  }

  private getClientConfig(tenant: string) {
    return { realm: 'realm-1', clientId: 'client-1', secret: 'secret-1', authServerUrl: 'http://your-keycloak-server/auth' };
  }
}

Conclusion

Dynamic Multi-Realm Authentication is implemented ✅ Guards enforce role-based accessToken introspection supports multiple clients

This approach enables a flexible, scalable, and secure multi-tenant authentication system. ๐Ÿš€

February 24, 2025

Understanding Multiple Login Events in Keycloak During Google SSO

Introduction

When implementing Single Sign-On (SSO) with Google as an Identity Provider (IdP) in Keycloak, you may notice that a single user login generates multiple login events—one for each client application. This can cause confusion, especially when debugging authentication flows or tracking user sessions.

In this blog post, we will explore why this happens, how to replicate it locally, and how to fix or control this behavior using Keycloak settings.

Why Do Multiple Login Events Occur in Keycloak During Google SSO?

This issue arises due to the OAuth 2.0 Authorization Code Flow with OpenID Connect (OIDC) that Google follows. When a user logs into one client application and then accesses another client application under the same Keycloak realm, Keycloak registers a separate login event for each client.

Key Factors Contributing to Multiple Login Events

  1. Google Uses a Shared Authentication Session:

    • When a user logs into Client1 via Google, Google creates a session.
    • When the user accesses Client2, Google detects the active session and automatically authenticates the user, without prompting for credentials.
    • Even though the user did not re-enter credentials, Keycloak registers a new login event.
  2. Keycloak Treats Each Client Separately:

    • Keycloak considers each client as an independent entity.
    • When a user accesses multiple clients, even within the same session, Keycloak triggers separate login events for tracking purposes.
  3. Google Login Response Includes New ID Tokens Per Client:

    • When Keycloak redirects the user to Google for login, Google issues a new ID Token for each client.
    • Even though the user remains authenticated, the new token issuance results in a new event.
  4. Keycloak Logs Each Authentication Request as a New Event:

    • Keycloak logs a separate authentication event each time an authentication request is made to the IdP (Google), even if credentials are not re-entered.

How to Configure Session Handling in Keycloak

Keycloak allows you to control whether users share the same session across multiple clients or have separate sessions per client. This can help manage login events more effectively.

Using the Same Session Across Clients

To enforce session sharing across multiple clients:

  1. Navigate to Realm SettingsTokens

  2. Adjust the SSO Session Idle Timeout and SSO Session Max Lifespan to maintain session continuity.

  3. Ensure that Full Scope Allowed is enabled for clients to share user sessions.

  4. Use the SameSite=None cookie setting to ensure session continuity in cross-client authentication.


Controlling the Number of Sessions in Keycloak

To limit how many active sessions a user can have:

  1. Navigate to Realm SettingsSessions.

  2. Configure Maximum Sessions per User to define the maximum concurrent sessions allowed.

  3. Enable Single Sign-Out so that logging out from one session logs the user out from all active sessions.

  4. Adjust Session Limits per client under Clientsclient1Settings.

These settings help you control how sessions are handled across different clients and prevent excessive login events.

Using Separate Sessions Per Client

If you need independent sessions for each client:

  1. Disable Full Scope Allowed for the client under Clientsclient1 or client2.

  2. Set Client Session Idle Timeout and Client Session Max Lifespan separately for each client under Advanced Settings.

  3. Use the prompt=login parameter to force Google authentication for each client.

How to Replicate Multiple Login Events Locally

Step 1: Set Up Keycloak Locally

  1. Start Keycloak in development mode:
    ./kc.sh start-dev
    
  2. Create a new realm (e.g., my-realm).
  3. Create two clients (client1 and client2) in the same realm.
  4. Configure both clients to use Google as an Identity Provider:
    • Go to Identity ProvidersAdd providerGoogle.
    • Configure the Client ID and Client Secret from your Google Cloud Console.
    • Set Redirect URIs for both clients (http://localhost:8081/* and http://localhost:8082/*).
    • Enable Standard Flow and Implicit Flow.

Step 2: Run Two Applications Using Keycloak Authentication

Run two separate web applications:

  • Client1 → http://localhost:8081
  • Client2 → http://localhost:8082

Ensure both applications:

  • Use the same Keycloak realm.
  • Have client_id configured accordingly.
  • Redirect to Google for authentication.

Step 3: Simulate an SSO Login Flow

  1. Open an Incognito browser window.
  2. Navigate to http://localhost:8081 and initiate login.
  3. Authenticate using Google.
  4. Open another tab and go to http://localhost:8082.
  5. Notice that the second application logs in without prompting for credentials.
  6. Check Keycloak logs under EventsLogin Events, and you will see two separate login entries.

How to Fix or Control This Behavior

1. Enable Single Session Across Clients

By default, Keycloak logs each client authentication as a separate event. However, we can enforce session sharing across clients:

  • Go to Realm SettingsTokens
  • Increase the SSO Session Max Lifespan to keep the session active longer.
  • Increase SSO Session Idle Timeout to avoid unnecessary re-authentication.

2. Adjust Client Session Settings

Each client may have different session handling settings. To standardize session behavior across clients:

  • Navigate to Clientsclient1 or client2.
  • Under Advanced Settings, adjust the SSO Session Idle Timeout.
  • Ensure Full Scope Allowed is enabled to share user sessions across multiple clients.

3. Enforce User Session Limits

To control how many login events are generated:

  • Go to Realm SettingsSessions.
  • Set Maximum Sessions per User to 1 to ensure a single session is active at a time.
  • Enable Single Sign-Out to ensure logging out from one client logs the user out from all clients.

4. Modify Google Authentication Prompt Behavior

If you want Google to prompt users for login every time (rather than using an existing session), modify the authentication request:

  • In the Keycloak Identity Provider settings for Google, set the prompt parameter:
    prompt=select_account
    
  • This forces Google to show the account selection screen every time a login is requested.

5. Control Login Event Logging in Keycloak

If you want to reduce unnecessary login event logging, you can modify Keycloak’s logging levels:

./kc.sh start-dev --log-level=INFO

Or update the logging configuration in standalone.xml:

<logger category="org.keycloak.events">
    <level name="WARN"/>
</logger>

How Custom SSO Calls Trigger Login Events in Keycloak

Custom authentication flows in Keycloak can also trigger login events. Here’s how:

  1. Using Keycloak REST API for Login:

    • When calling the POST /realms/{realm}/protocol/openid-connect/token endpoint with valid credentials, Keycloak registers a login event.
  2. Programmatic Login via JavaScript Adapter:

    keycloak.login({ redirectUri: 'http://localhost:8081/home' });
    
    • This triggers a login event for the client initiating the request.
  3. Custom Authentication Flows:

    • Implementing a custom authenticator in Keycloak SPI that handles login logic can generate login events.
  4. Silent Authentication Requests:

    • When the frontend attempts a silent login via check-sso, Keycloak may log an event if a session refresh is required.

Conclusion

Experiencing multiple login events when using Google SSO with Keycloak is a common scenario due to how OAuth 2.0 and OIDC work. The main reasons include Google’s session management, Keycloak’s client separation, and Google issuing new ID tokens per client.

By following the recommended fixes and understanding how custom SSO calls interact with Keycloak, you can control and optimize login event handling effectively.

February 22, 2025

Keycloak SSO Google Login Triggering Multiple Events for Different Clients

Introduction

In a production environment, a peculiar issue was observed where a user logging into one client application via Google SSO in Keycloak also triggered a login event for another client. This behavior was unexpected and could not be reproduced in a local development environment. This blog post explores possible causes, how to reproduce the scenario, root cause analysis, potential solutions, and additional resources for further reading.

Understanding the Issue

Observed Behavior

  • A user attempts to log in to Client A via Google SSO.
  • The login event is recorded for Client A as expected.
  • However, another login event is also recorded for Client B, even though the user did not explicitly attempt to log into it.
  • This issue does not occur consistently and is difficult to reproduce locally.

Possible Causes

  1. SSO Session Sharing Across Clients

    • If both clients (A and B) are configured within the same realm in Keycloak and have SSO enabled, logging into one client might automatically establish a session for the other.
    • Read more
  2. Misconfigured Authentication Flow

    • Certain configurations in Keycloak (e.g., implicit flow, forced re-authentication) could lead to multiple login events.
    • Keycloak Authentication Flows
  3. Redirect URIs and Post-Login Flow Issues

    • If Client B has a similar redirect URI or shares authentication flow parameters with Client A, it may also receive an authentication response.
    • OAuth Redirect URI Best Practices
  4. Cached or Persistent Sessions in the Browser

  5. Automatic Session Propagation

    • If session propagation is not explicitly disabled, Keycloak may attempt to log the user into multiple clients within the same realm automatically.
    • Disable Automatic Session Propagation
  6. Custom Login Implementation Issues

Steps to Reproduce

Prerequisites

  • Keycloak set up with two clients (Client A and Client B) within the same realm.
  • Google SSO configured as an Identity Provider.
  • Custom REST API for login via SSO.

Reproduction Steps

Step 1: Set Up Two Clients in Keycloak

  • Configure Client A and Client B to use Keycloak for authentication.
  • Ensure both clients are in the same realm.
  • Enable Standard Flow and Direct Access Grants in the client settings.

Step 2: Enable SSO for Both Clients

  • In Keycloak, navigate to Realm Settings → Login and enable SSO session sharing.
  • Set SSO Session Max Age to a high value to allow multiple logins within the same session.

Step 3: Implement Custom Login via REST API

  • Create a custom API that calls Keycloak’s token endpoint using the authorization code from Google SSO.
  • Ensure that both Client A and Client B share the same authentication flow.
  • Execute the API call for Client A.

Step 4: Simulate Concurrent Login Requests

  • Use a script or Postman to send multiple login requests to the custom API for different clients.
  • Ensure that the user session is already established for Client A.

Step 5: Check Keycloak Events

  • In Keycloak Admin Console, go to Events → Login Events.
  • Verify if an additional login event appears for Client B.

Root Cause Analysis (RCA)

  1. SSO Session Reuse Across Clients

    • Keycloak maintains a centralized session for a user across all clients in the same realm.
    • If a user logs into one client, Keycloak may automatically propagate the session to another client.
    • Keycloak Session Management
  2. Misconfigured Redirect URIs and Authentication Flows

  3. Custom REST API Handling Issues

Possible Solutions

1. Disable Automatic Session Propagation

  • Navigate to Realm Settings → SSO Session Max Age.
  • Adjust session parameters to restrict automatic logins.
  • Disable Full Scope Allowed for each client in Client Settings → Scope.
  • Set SameSite=None; Secure for authentication cookies to prevent unintended cross-client logins.
  • More on Keycloak Session Management

2. Validate Redirect URIs

  • Ensure each client has unique and correctly configured redirect URIs to prevent unintended authentication responses.
  • Navigate to Client Settings → Valid Redirect URIs.
  • Best Practices for Redirect URIs

3. Use Client-Specific Authentication Flows

4. Check Google SSO Provider Configuration

  • Ensure that Google SSO is not configured to redirect users to multiple clients inadvertently.
  • Validate that the post-login redirect URL in Google’s OAuth settings is pointing to the intended client only.
  • Configuring Google OAuth

5. Modify Custom REST API Login Implementation

  • Ensure that each login request is specific to a single client by validating client_id.
  • Modify session handling to prevent unintended reuse across clients.
  • Implement token validation before issuing new access tokens.
  • Keycloak REST API Guide

Conclusion

This issue likely arises due to session sharing, misconfigured authentication flows, or incorrect redirect URIs. By isolating login sessions per client and fine-tuning Keycloak settings, unintended login events can be prevented. If you’re facing this in production, analyze login events in Keycloak to trace the issue further and apply the solutions outlined above.


Let me know if you've encountered similar issues or found alternative solutions!

January 31, 2025

The Complete Guide to Managing Access Tokens in Keycloak

Keycloak is an open-source identity and access management solution that enables authentication and authorization for modern applications. One of its critical components is Access Tokens, which dictate user access permissions and session validity. Configuring access tokens effectively ensures a balance between security, user experience, and performance.

This guide provides a comprehensive look at managing access tokens in Keycloak. We will cover general practices, custom configurations, common challenges, debugging techniques, and best practices for securing and optimizing access tokens.


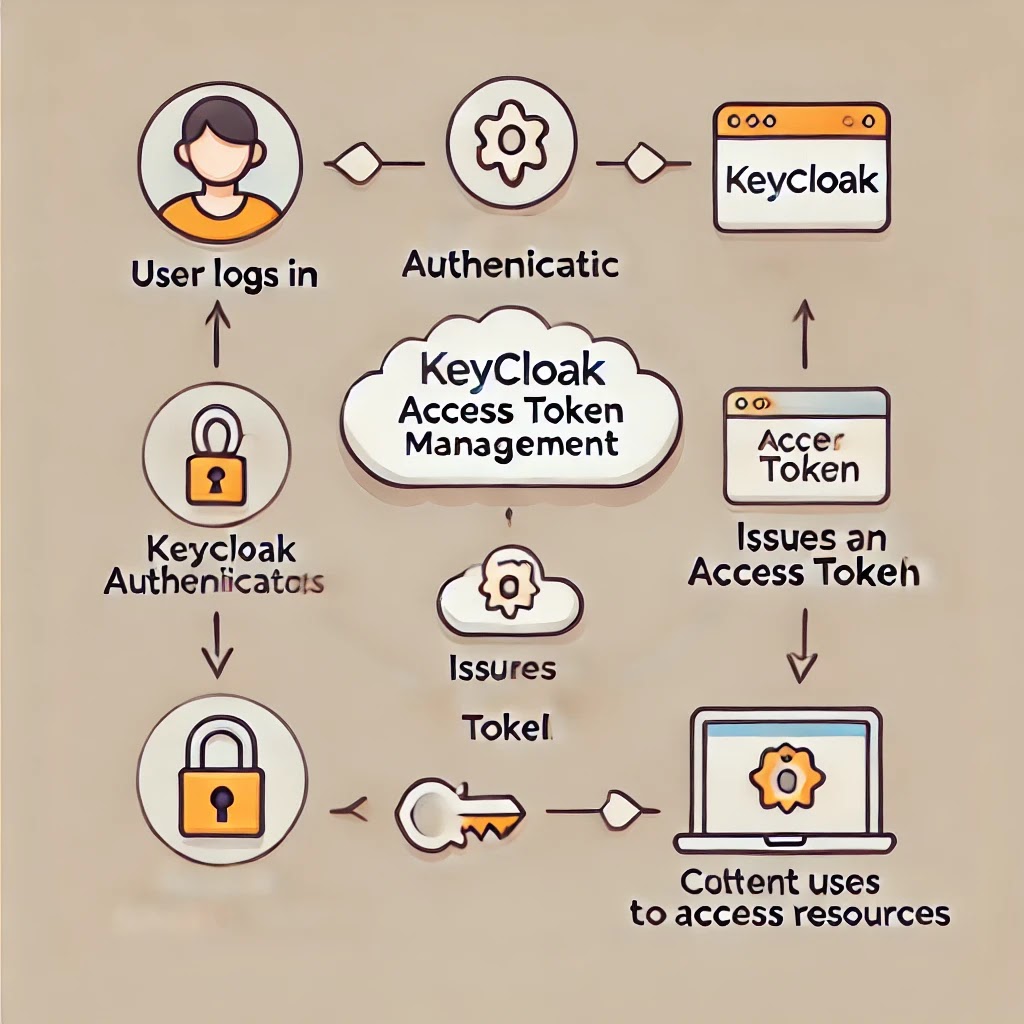
Keycloak Access Token Flow


1. Understanding Access Tokens in Keycloak

What is an Access Token?

An Access Token is a short-lived credential used by applications to access protected resources on behalf of a user. Keycloak issues these tokens after authentication, and they are included in API requests for authorization.

Key Access Token Properties:

  • Access Token Lifespan – Determines how long a token remains valid before expiration.
  • Refresh Token Lifespan – Defines the validity period for refresh tokens used to generate new access tokens.
  • SSO Session Timeout – Determines how long a user session remains valid across multiple applications.
  • Client Login Timeout – Specifies the time limit for a client to complete the login process before timeout.


2. Configuring Access Token Settings in Keycloak

Keycloak allows administrators to configure access token settings at different levels: Realm, Client, and User.

A. Changing Access Token Lifespan at the Realm Level

To modify Access Token settings for an entire realm:

  1. Log in to Keycloak Admin Console.
  2. Navigate to Realm Settings > Tokens.
  3. Modify the Access Token Lifespan (e.g., from 5 minutes to 30 minutes).
  4. Click Save.

Example: Updating Token Settings via Keycloak REST API

curl -X PUT "http://localhost:8080/auth/admin/realms/{realm}/clients/{client-id}" \
     -H "Authorization: Bearer {admin-token}" \
     -H "Content-Type: application/json" \
     -d '{ "accessTokenLifespan": 1800 }'  # 30 minutes

B. Configuring Access Token Per Client

If you want different access token settings per client:

  1. Go to Clients in the Keycloak Admin Console.
  2. Select the client to configure.
  3. Open the Advanced Settings tab.
  4. Modify the Client Session Idle Timeout and Client Session Max Timeout.
  5. Click Save.

Use Case: API clients may have different access token requirements than web applications due to security concerns.

C. Setting Access Token Lifespan Per User

To configure access token settings for a specific user:

  1. Navigate to Users in Keycloak Admin.
  2. Select the user for whom you want to set a custom policy.
  3. Modify session-based token policies under Credentials.
  4. Click Save.

Use Case: You might want to grant longer access tokens to admins while limiting standard users.


3. Debugging and Troubleshooting Access Token Issues

A. Common Issues and Fixes

1. Token Expiring Too Soon

  • Check the Access Token Lifespan and SSO Session Timeout settings.
  • Use Refresh Tokens to extend sessions.

2. Invalid or Expired Access Token Errors

Verify token validity using Keycloak’s introspection endpoint:

curl -X POST "http://localhost:8080/auth/realms/{realm}/protocol/openid-connect/token/introspect" \
     -H "Content-Type: application/x-www-form-urlencoded" \
     -d "client_id={client-id}&client_secret={client-secret}&token={access-token}"
  • If expired, adjust token lifespan in Realm Settings.

3. Token Not Containing Required Claims

  • Ensure Client Scopes are correctly configured.
  • Modify mappers in Client Scopes to include necessary claims.

4. Customizing Access Token Behavior in Keycloak

A. Extending Access Token Claims

To add custom claims to access tokens:

  1. Go to Client Scopes in Keycloak Admin.
  2. Create or modify a mapper to include custom claims.
  3. Assign the scope to the client where needed.

Example: Adding a Custom Claim via Java Code

public class CustomTokenMapper extends AbstractOIDCProtocolMapper {
    @Override
    public void transformIDToken(IDToken token, ProtocolMapperModel mappingModel, KeycloakSession session, UserSessionModel userSession, ClientSessionContext clientSessionCtx) {
        token.getOtherClaims().put("custom_claim", "custom_value");
    }
}

B. Implementing Script-Based Custom Token Logic

For advanced scenarios, create a custom provider using Keycloak’s SPI:

  1. Implement a Java class extending OIDCProtocolMapper.
  2. Register it in Keycloak’s providers directory.
  3. Restart Keycloak to apply changes.

5. Best Practices for Access Token Management

  • Shorten Access Token Lifespan: Reduces risk if a token is compromised.
  • Use Refresh Tokens: Instead of extending access token lifespan, leverage short-lived access tokens with refresh tokens.
  • Limit Token Scope: Assign minimal permissions necessary.
  • Enable Token Introspection: Validate access tokens dynamically before granting access.
  • Use Client Credentials Grant for Machine-to-Machine Communication: This avoids unnecessary user-based authentication.

Conclusion

Managing access tokens in Keycloak requires careful consideration of security, usability, and performance. Whether adjusting global settings, client-specific configurations, or per-user access policies, Keycloak offers extensive flexibility to fine-tune authentication and authorization.

By following best practices and leveraging debugging techniques, you can create a secure, scalable, and efficient authentication system tailored to your requirements.

Do you have any Keycloak challenges? Drop a comment below, and let’s solve them together! ๐Ÿš€

January 30, 2025

Authenticate vs AuthenticateOnly in Keycloak: Choosing the Right Method for Your Authentication Flow

When implementing authentication in a secure web application, Keycloak provides a flexible authentication system that allows you to handle different steps in the authentication process. But one question that often comes up is: When should I use authenticate() vs authenticateOnly()?

Both methods are essential for different scenarios, but understanding their differences will help you decide when and why to use each one in your app's security workflow.

Let’s break down authenticate() and authenticateOnly(), how they differ, and when to use each for optimal authentication flow management.

What’s the Difference?

1. authenticate(): The Full Authentication Flow

The authenticate() method is used to complete the entire authentication process. This includes everything from credential validation (username/password) to multi-factor authentication (MFA) and token issuance.

Once this method is called, Keycloak marks the user as authenticated, issues any necessary tokens (like access and refresh tokens), and starts a session for that user. The user is now ready to access protected resources and can be redirected to the appropriate page (e.g., the home page, dashboard, etc.).

Key Actions with authenticate():
  • Finalizes the authentication session: Sets up a valid session for the user.
  • Issues tokens: If configured, the access and refresh tokens are generated and associated with the user.
  • Triggers login events: The event system records a login event.
  • Redirects the user: Based on your configuration, the user is sent to the correct post-login location.

2. authenticateOnly(): Validating Credentials Without Completing the Flow

The authenticateOnly() method is a lighter, more specialized method. It is used for validating credentials or performing other checks like multi-factor authentication (MFA) but without finalizing the authentication process.

When you call authenticateOnly(), you’re just checking if the user is valid (for instance, verifying their username/password or MFA token), but you’re not completing the session. This is useful in situations where you might need to verify something before fully logging the user in.

Key Actions with authenticateOnly():
  • Validates credentials: Checks whether the user’s credentials are correct.
  • Doesn’t finalize the authentication session: The session remains uninitialized, and no tokens are issued.
  • No login event: No login event is triggered; the user isn’t officially logged in yet.
  • No redirection: No redirection happens, since the flow isn’t finalized.

When to Use Each Method?

Use authenticate() When:

  • You’re ready to complete the entire authentication flow: After the user’s credentials (and optional MFA) are validated, you call authenticate() to finalize their session.
  • You need to issue tokens: For user sessions that require tokens for API access, you'll need to use authenticate().
  • The user should be able to access the system immediately: After a successful authentication, you want the user to be logged in and able to interact with your system right away.

Use authenticateOnly() When:

  • You need to perform credential validation but don’t want to finish the entire authentication flow (e.g., checking user credentials but still deciding if you need to continue with additional checks like MFA).
  • You’re just verifying the user: For example, if you need to verify MFA before proceeding with final authentication, use authenticateOnly().
  • Skipping token issuance: If you’re only validating the user's credentials but don’t need to issue tokens yet (e.g., in a case where the session state isn’t needed right now).
  • Testing credentials or certain conditions: For pre-checks like validating a password or OTP, but you don’t need to proceed with the user being fully authenticated yet.

Key Differences at a Glance:

Featureauthenticate()authenticateOnly()
Session FinalizationYes, the session is marked as authenticated.No session finalization happens.
Token IssuanceYes, access and refresh tokens are issued.No tokens are issued.
Login EventYes, a login success event is triggered.No login event is triggered.
RedirectYes, redirects the user based on configuration.No redirection occurs.
When to UseWhen the user is fully authenticated and ready for system access.When you need to validate credentials but not finalize the authentication.

How to Fix "Error Occurred: response_type is null" on authenticate() Call

One common issue developers may encounter when using authenticate() is the error: "Error occurred: response_type is null". This typically happens when Keycloak is unable to determine the type of response expected during the authentication flow, which can occur for various reasons, such as missing or misconfigured parameters.

Steps to Fix the Issue:

  1. Check the Authentication Flow Configuration: Ensure that your authentication flow is properly configured. If you're using an OAuth2/OpenID Connect flow, ensure that you are sending the correct response_type in the request. The response_type is typically set to code for authorization code flow, token for implicit flow, or id_token for OpenID Connect flows.

  2. Validate the Client Configuration: The client configuration in Keycloak should specify the correct response_type. Ensure that the Valid Redirect URIs and Web Origins are correctly configured to allow the response type you're using.

  3. Inspect the Request URL: Verify that the request URL you’re using to trigger the authentication flow includes the necessary parameters, including response_type. Missing parameters in the URL can cause Keycloak to not process the authentication correctly.

    Example URL:

    bash
    /protocol/openid-connect/auth?response_type=code&client_id=YOUR_CLIENT_ID&redirect_uri=YOUR_REDIRECT_URI&scope=openid
  4. Use Correct Protocol in Authentication: If you're using a non-standard protocol or custom flows, make sure the appropriate response_type is explicitly specified and is supported by your client.

  5. Debug Logs: Enable debug logs in Keycloak to get more insights into the issue. The logs will help you track the flow and identify which part of the request is causing the problem.

  6. Review Custom Extensions: If you're using custom extensions or modules with Keycloak, ensure that they aren’t interfering with the authentication flow by removing or bypassing necessary parameters.

Real-World Examples

Scenario 1: Full Authentication (Password + MFA)

You have a system that requires both a password and multi-factor authentication (MFA). Once the password is verified and the MFA code is correct, you want to fully authenticate the user and issue tokens.


if (isPasswordValid() && isMFAValid()) { processor.authenticate(); // Complete the authentication flow } else { throw new AuthenticationException("Invalid credentials or MFA failed"); }

Scenario 2: MFA Verification Only

Imagine you’ve already validated the user’s password, but now you need to verify their MFA code. You use authenticateOnly() to verify the MFA, but you don’t want to finalize the authentication session until everything is validated.


if (isMFAValid()) { processor.authenticateOnly(); // Only validate MFA, don’t finalize the session yet } else { throw new AuthenticationException("Invalid MFA code"); }

Conclusion:

Understanding when to use authenticate() versus authenticateOnly() is crucial for optimizing your authentication flows in Keycloak. If you’re finalizing the user’s login and granting access, use authenticate(). If you’re performing intermediate checks or need to validate credentials without finalizing the session, authenticateOnly() is the better option.

In case you're facing the error "response_type is null", ensure that your authentication request includes the correct parameters, the client is properly configured, and the correct flow is being used.

By leveraging these methods appropriately, you can create a more secure and efficient authentication process for your users, giving you fine-grained control over how and when authentication happens in your system.

January 25, 2025

Understanding CommonClientSessionModel in Keycloak

 The CommonClientSessionModel interface in Keycloak serves as a foundational component for managing client sessions. It provides methods and enums to handle session-specific attributes, actions, and execution states. Understanding and leveraging this interface is essential for building robust, secure, and dynamic authentication flows.


Key Features of CommonClientSessionModel

  1. Session Management: Provides methods to manage session-specific data like redirect URIs, actions, and protocols.
  2. Enums for Actions and Status: Defines enums such as Action and ExecutionStatus to standardize session behaviors and outcomes.
  3. Integration with Realms and Clients: Tightly coupled with RealmModel and ClientModel, enabling seamless integration into the Keycloak ecosystem.

Methods in CommonClientSessionModel

1. getRedirectUri and setRedirectUri

  • Purpose: Manage the URI to which the user is redirected after authentication.
  • Example:
sessionModel.setRedirectUri("https://example.com/callback");
String redirectUri = sessionModel.getRedirectUri();

2. getAction and setAction

  • Purpose: Define and retrieve the current action for the session.
  • Example:
sessionModel.setAction(CommonClientSessionModel.Action.AUTHENTICATE.name());
String action = sessionModel.getAction();

3. getProtocol and setProtocol

  • Purpose: Specify the protocol used in the session (e.g., OpenID Connect, SAML).
  • Example:
sessionModel.setProtocol("openid-connect");
String protocol = sessionModel.getProtocol();

4. getRealm and getClient

  • Purpose: Retrieve the associated realm and client models.
  • Example:
RealmModel realm = sessionModel.getRealm();
ClientModel client = sessionModel.getClient();

Enums in CommonClientSessionModel

1. Action

Defines actions that can be taken during a session. Examples include:

  • OAUTH_GRANT: Handles OAuth grants.
  • AUTHENTICATE: Initiates user authentication.
  • LOGGED_OUT: Represents a logged-out state.
  • USER_CODE_VERIFICATION: Used for verifying user codes in device flows.

Example: When to Use USER_CODE_VERIFICATION

  • Scenario: Implementing a device authorization grant flow where users enter a code to verify their identity.
  • Implementation:
sessionModel.setAction(CommonClientSessionModel.Action.USER_CODE_VERIFICATION.name());
// Handle user code verification logic here

2. ExecutionStatus

Defines the status of an authentication execution. Examples include:

  • FAILED: Execution failed.
  • SUCCESS: Execution succeeded.
  • CHALLENGED: A challenge was presented to the user.
  • EVALUATED_TRUE / EVALUATED_FALSE: Used for conditional checks.

Changing ExecutionStatus

To set or change the execution status, you can update the associated execution logic.

Example: Changing ExecutionStatus

AuthenticationExecutionModel execution = getExecution(realm, "execution-id");
execution.setExecutionStatus(ExecutionStatus.SUCCESS);
saveExecution(execution);

When to Use CommonClientSessionModel

1. Action-Specific Flows

Use setAction to dynamically assign actions based on the authentication flow. For example:

  • AUTHENTICATE: Used for standard login flows.
  • USER_CODE_VERIFICATION: Ideal for device login scenarios.

2. Tracking and Debugging Execution States

Leverage ExecutionStatus to monitor and debug authentication flows. For example:

  • Track failed executions and log error details.
  • Use CHALLENGED to understand where users faced challenges in the flow.

3. Protocol-Specific Implementations

Use getProtocol and setProtocol to differentiate between OIDC and SAML flows. This is especially useful in multi-protocol environments.


Best Practices

  1. State Management:

    • Ensure actions and execution statuses are updated correctly to prevent inconsistencies.
    • Use enums like ExecutionStatus to standardize status updates.
  2. Security:

    • Avoid storing sensitive data directly in session attributes.
    • Regularly validate session attributes to prevent unauthorized modifications.
  3. Error Handling:

    • Log and track execution failures using ExecutionStatus.
    • Provide meaningful error messages to guide users through challenges.
  4. Documentation:

    • Maintain detailed documentation for custom actions and execution flows.
  5. Testing:

    • Test all possible execution statuses to ensure robust handling of edge cases.

Additional Reading

By leveraging CommonClientSessionModel, you can build highly customizable and secure authentication flows tailored to your application's needs.